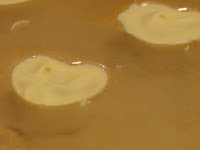

For the peanut butter filling:
- ½ cup creamy peanut butter
- 4-1/2 teaspoons butter, softened
- ¾ cup confectioners’ sugar
- ½ teaspoon sea salt
Everything else:
- Any color of chocolate disks from a craft or candy shop. I used pink and white, since they’re Valentine themed.
- Plastic candy mold – you can find these at any craft store like JoAnn’s, Hobby Lobby, or Michael’s. I chose to use a heart shape, but you choose whatever you like.

Put about 1/2 cup of chocolate disks into a small glass bowl. Heat in the microwave for approx. 2 ½ to 3 minutes, stopping after each minute to stir well. Chocolate should be smooth and glossy; be careful not to scorch it.
 Once it’s smooth, use a spoon to put a small portion in each candy mold, forming a “shell” of chocolate and leaving the center empty. Once the molds are filled, put it in the fridge about 5 minutes, or until chocolate is firm.
  Remove and put a small dab of peanut butter filling in the center of each candy mold, being careful the filling is a little below the top of the candy. Now take a little melted chocolate and spread over the filling, being careful to fill in the shape. Shake gently to remove air bubbles. Put molds into the freezer for about ten minutes.
 Once firm, remove and invert, gently popping the candies out of the mold.
If you want to add polka-dots, melt another color of chocolate and use the end of a toothpick to paint on candy dots. Be sure dots are firm before you store the candy. If layering cups, use wax paper to separate.
These are a great way to say "I love you" any time of year ... from inside a lunch box, on a pillow, or on the edge of a breakfast plate. :)
Thanks to Jen and Lisa for hosting Tasty Tuesday and Tempt My Tummy Tuesday!


1 COMMENTS ~ Click here to leave a COMMENT:
Those look beautiful and delicious! I haven't tried my hand at candy making in a long time...this might be worth another go. :) I'm visiting from Tasty Tuesday. Hope you'll stop by my blog to say hi. :)
Post a Comment